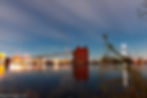
How to photograph night landscapes.
- Mike
- May 18, 2020
- 7 min read

It's one of the most rewarding forms of photography. Sitting beside your camera in a pitch black night, waiting for the timer on your phone to go off so you can end the exposure. You are silent, your camera is silent, but the little red light says that it's thinking, and it's gathering light. Bit by bit light streams into your camera like drops in a bucket until suddenly, your timer goes off. You release your remote trigger and your camera splits the silence with a "shh...ka-chink." Back to silence, but a few seconds later your image appears on the back. If you're lucky, and with a little skill, you'll have something really special pop up on your camera screen. Such is the world of night photography. But it's not a simple process to learn. It requires some gear, and it requires a lot of planning. I'll show you how to get started.
There's four easy steps to get started.
1. Equipment
2. Planning
3. Execution
4.Post-processing
What you need.
First off. You need a camera that can do long exposures. I know some people think the newest phone is the be all and end all of cameras, but DSLRs are the way to go. You need a shutter and you need complete control of your sensor.
You must absolutely have a tripod, and not just any will do. You need a heavy and sturdy tripod. My experience says that the best photos are ruined by a breeze shaking things. So get a sturdy one.

You really also need a remote shutter release, preferably with a timer. Lucky for you those big photographers with expensive intervalometers aren't using gear you need. This bad boy from Amazon is only $22, and it has a lot of nifty features. The only ones we care about here are with the big button and switch in the middle.
This tool is invaluable to you as it allows you to activate your camera in any mode as if you were pressing the shutter release. When you press the buttons on your camera you introduce flex into your tripod. That spring back will create blur at the beginning of your exposures. So by simply pressing the button on the trigger instead you can do the same function without having to worry about shaking your camera. Also, there's the switch function on this that allows you to put your camera into "bulb" mode and shoot exposures as long as you want. This is awesome because once you activate the switch a timer will appear allowing you to see exactly what your exposure is in minutes and seconds. Sometimes you need to double a 30 second exposure to a minute, sometimes it's jumping from 5 to 10 minutes. Either way you can control your shutter time easily with this.
Lastly, you need to experiment with your glass because let me tell you, not all lenses behave the same, and they are all wild beasts in the dark.

Look at how muddy the lights are! This is partly the fault of not shooting with a high f-stop and partly from the glass itself. During the day you mostly won't notice this but at night the lights in the distance are basically pinpoints. That light comes into your lens and bounces around from any imperfection in the glass, or even from internal reflections galore. Sometimes a cheaper lens is better than the expensive one, it's just witchcraft. That's why you should also look at night photos from a lens that you plan to use for night photography. Don't just assume that a lens will be good in the dark.

For comparison this is a kit lens 18-55 stepped down to the highest f-stop. Note how much stronger the diffraction spikes are and how much clearer the image is.
Other than a tripod, a good lens, and a intervalometer there's not much that you need besides a flashlight.
Planning your shot.
Planning is the single most important step. You have a lot of planning for most night shots. It's downright stupid to go fumbling around in the dark with your expensive camera gear without a plan. Most planning will occur during the day so it's a good idea to find your interesting shot during the day or evening before the sun sets completely and scope it out. Take notes, or just use your cell phone to gather some details.
First, plan your light. We need at least a little light to illuminate our subject. Street lights work but you don't want to be shooting directly into them. The same lighting rules that apply to studio lighting apply here. The moon works great, but do you know when and where it will be best lighting your subject? Figure that out with Stellarium. Bringing your own light is also an option. There are several great lighting options but I prefer battery powered lights. A flashlight bouncing around can do wonders for an otherwise dull image, but LED lights with a gel can be amazing. I lit this image with a single LED light and a blue gel. The benches would be too dark to see otherwise as they'd be in the shadow of the fire. This is the cheap light I use.

.
We also need a place to safely set up our camera. Remember for instance that cars can't easily see us after dark. We also will need to leave our camera still for some time. Plan that out ahead of time.
Executing that perfect shot.
Night photography is a little bit of science, little bit of practice, and a dash of witchcraft. It's not possible to explain everything about how to get the perfect shot. Things are different every time you go out and shoot. Trial and error plus some skill leads to the best results. Take a practice shot, figure out what you need to do to get the correct exposure and then adjust things. That's the ticket to good shots. There are a couple hard a fast rules you should know about.
ISO is your enemy.
Wanna ruin your shot? Crank the ISO to shorten your exposure time. The higher the ISO the more grain you introduce. Night shots have low contrast and are very susceptible to destructive noise. This isn't "grain" like film, there will be streaks, lines, and patterns in places like your sky that even Lightroom can't fix. Don't screw around here, leave the ISO below 1600 on any cropped sensor camera. I almost exclusively shoot at 100 ISO even if that means 20 minute exposures. To see how ISO will affect your photos check out our blog post on the subject.

Time blurs all things.
Wanna get silky smooth water like this? Want those mellow clouds? This is achieved with only a 1 minute exposure. Seriously! The motion of anything that moves will become blurred. Sometimes this is what you want, but sometimes it isn't. For instance people will become blurry ghosts with long exposure.

Focus on getting the correct exposure for your subject.
Figuring out your exposures up to 30 seconds is easy, just let your camera figure it out. For exposures over 30 seconds things become very complicated very fast. For most of us, light meters aren't something we carry around. So your tool is your camera, use trial and error to find the best exposure. With experience you'll get it right with less tries. You decide that a 30 second exposure won't be enough so you try a two minute exposure. It's half as bright as you want, so you should double to 4 minutes for your next shot. You take a 4 minute shot and decide its still a little dark so you go for a 5 minute exposure and that's too bright. So your final and correct exposure is actually 4:30 at your given ISO. That's ok, no biggie. I understand that this is exhausting sometimes but art is hard work. You've essentially just bracketed manually your exposure. The good news is that long exposures are more forgiving. 10-20 seconds fast or slow on a moonlit night won't make much difference at 100 ISO. 10-20 minutes won't make much difference on a moonless night.
Close your lens' aperture for sharpness.
Wide aperture leads to chromatic aberration when pointed at lights. Because the lights we deal with at night are very narrow in their color spectrum most of the time, those aberrations will do funny things to our picture that will make it muddy and appear out of focus. We combat this by stepping our f-stop up. I usually shoot above f-16. Also, by doing this you will achieve sharper focus which is very important at night as sharpness is everything. It seems counter intuitive but then again you'd be doing the same thing for sharpness during the day. It actually does make sense in the end.
Don't worry about the colors too much, don't fret about the orange glows of city lights either, we can fix that in Lightroom. Your real concern is getting your subject correctly exposed in camera. You cannot push or pull long exposures much. If you finish a 10 minute shot and think it looks too dark, take the time to do a 25 minute exposure.
Editing your photos.
Ok, so you got an interesting subject at a correct exposure. Now you import it into Lightroom and it looks like crap. Ouch? Well maby not. At night colors come into your camera muted. This means that you'll almost always crank the saturation afterwards. But that also means the colors can be funny. You'll have to experiment with your white balance and saturation values.

Also, you'll be masking a lot. Take the time to bring things towards the brightness that they should be in relation to each other, it'll take more time than a daylight photo But with a little bit of work your photo will turn out very pretty in many cases. And when you nail it, you'll feel amazing.